Saturday, August 29, 2015

Share internet in Uniworld Wifi

AIM: To use Uniworld internet on multiple devices.

Ist method: Share internet from Laptop to other laptops and Cell phones (Android, Windows, IOS)

1. Login onto Uniworld Wifi from your laptop using the web browser.
2. Open command prompt with administrative rights and use the following 2 commands to create your own hotspot (no need of connectify software) on your laptop.

netsh wlan set hostednetwork mode=allow ssid=MyInternet key=qazxsw123
netsh wlan start hostednetwork

where, MyInternet is the desired network name you want to set and
qazxsw123 is the desired Wifi password you want to set.

3. Now open Network and Sharing centre in Windows 7 and note down the newly created wireless / local area connection name followed by a number 1 or 2 or 3. for example, mine is MyInternet: Wireless local area connection 2

4. Now right click on "Uniworld" network properties and select "Sharing" tab above.
5. Tick on "Allow other users to connect through this computer's internet."
6. Just below it "Select a private connection" select the one which you noted down in Step-3.

7. Now on your cellphones, or other laptops search for your Wifi name (MyInternet) you created and enter the password you had set in Step-2.
8. You should now be able to browse internet on both laptop and cellphones.

2nd method: Share Uniworld internet from Mobile to one Laptop.

Here you connect and login to Uniworld wifi on your cellphone and use USB cable from phone to PC / Laptop.

Once you log-on to Uniworld wifi through web page on your Android phone, just connect your phone to Laptop via USB cable and select USB tethering in Settings >> More >> USB Tethering.

Your laptop and Cell phone would both have the same internet.
Read more...

Tuesday, April 8, 2014

How to remote control Raspberry Pi desktop screen from Windows

Aim of tutorial: To remote control / share Raspberry pi desktop screen to your Windows computer or Iphone / Ipad / Android / Windows Phone.

Pre-requisites:
> Raspberry pi running Wheezy raspbian OS and connected to a home network router wired /wirelessly.
> Internet enabled on rapsberry Pi
> Ip address of raspberry Pi (ifconfig command)


Step 1: Login to raspberry Pi via putty or connect the raspberry pi to a TV and start the terminal.

Step 2: You can either login as Pi user or root user. remember to add sudo before using any command if logging in as pi user.Find out your IP address using:
ifconfig eth0 or ifconfig wlan0

Step 3: Use the following command and hit enter:

sudo apt-get install xrdp

after the installation completes your XRDP service should now be able to survive reboot also.

chkconfig --level 2345 xrdp on
(you may need to install chkconfig first)

Step 4: Windows PC users can use the in-built program to access their raspberry Pi screen as follows:

 Press the start button and search for "Remote Desktop Connection"

> Start the program by clicking it.
> Enter the Ip-address of raspberry Pi into the computer field and connect.


> You will be welcomed to enter your raspberry Pi login and password.


> The default login for raspberry Pi is , Login Id: pi and password: raspberry
> After a few seconds your raspberry pi's desktop screen will be in front of your eyes.


It is also possible to access your raspberry pi from remote location by port forwarding your router / gateway with Port number: 3389.

Android Users:
You can download "Microsoft Remote Desktop" app from Google Playstore and configure it the same way to access your raspberry pi screen on your android Phone or Tablet.

Windows Phone users:
You can download "ConnectMe" app from windows market place and configure it by entering your raspberry Pi ip address.


Read more...

Sunday, March 2, 2014

How to turn an old Wireless Router to a Wireless repeater OR extend an existing wireless network using DD-WRT firmware.

AIM of Tutorial: To turn a Wi-Fi Router into a WiFi - Card or WiFi - Extender / Repeater to an existing Wireless Network. OR To extend a Wireless Network, wirelessly using another Wifi Router.


Have a spare or outdated router ? If YES ! then here is how to make smart use of it.
All you need to do first is to check the DD-WRT support and custom firmware which needs to be installed before going ahead.

My Network configuration:

1st Router Model:                   Netgear JWNR2000 (Factory Firmware)
1st Router Access:                  192.168.1.1  (DHCP ENABLED)
1st Router Wireless Network: SSID: SoftwareKing
                                               Security type: WPA2 Personal
                                               Encryption Method: AES only
                                               Security Key: mykey12233221

2nd Router Model:                 D-Link DIR-615 E4   (might work with other H/W versions also)
Flashed DDWRT ROM:        (Non- Factory) v24 Pre SP2 [Beta] Build: 21061  (Default settings)
2nd Router access:                 Default IP: 192.168.1.1
                                             Username: admin
                                             Password: admin

Assuming you have already flashed this custom DD-wrt firmware on your router, we will go ahead..

1. > Make a note of your 1st Router's Security type, Encryption Method, Security Key like I have done above. (No changes have been done on 1st router for this tutorial)


On the 2nd Router :


1.> On the main screen, Go to the "Status" Tab and then "Wireless" tab below.

1.1 Scroll down on this page to find the button "Site Survey"


1.2 Click on "Site Survey" to find the wireless networks available nearby.

1.3 Click on "Join" on the specific network to which you want your 2nd router connect to. Say for example: wireless network SoftwareKing being broadcast-ed from my 1st router.

2.> Joining the Network will take me automatically to the Wireless configuration page having the details automatically filled.

2.2 On the same page: Set "Wireless Mode" to "Client" and SAVE.

2.3 Now go to "Wireless Security" and enter the Security Type as WPA2 PersonalAES and the Key: mykey123321 (that matches your 1st router) and SAVE Only.

2.4 Now back to "Basic settings" under Wireless , you will see Virtual interfaces menu,
2.5 Add a virtual interface
2.6 Select Wireless mode: AP
2.7 Wireless Network Name: Anything you like, apart from the 1st router's ssid.
2.8 Wireless ssid broadcast: Enabled
2.9 Advance settings : Un-ticked
and then go to "Wireless Security" and enter the Security Type as, WPA2 PersonalAES and the Key: 2ndmykey123321 SAVE and APPLY.

3.> Now under "Setup" Tab select "Basic setup"
3.1 Set "Connection type" to "Static IP" and set an IP address of range 192.168.1.xxx ( I have set 192.168.1.8)

3.2 Now, Scroll below and set Router IP address to:

Ip Address :192.168.2.1
Subnet mask :255.255.255.0
Gateway: 0.0.0.0 
Local DNS: 0.0.0.0

3.3 Scroll down to DHCP settings and disable the DHCP Server and then SAVE and APPLY.

4.> Now your router will restart and will be accessible only from 192.168.2.1 in the address bar.

4.1 Assign Static IP addresses to all the devices connected to 2nd Router of range 192.168.2.xxx because we have disabled DHCP server on it. 

Note that: The 2nd router will have its own subnet, but services available on 1st subnet would be accessible from 2nd.

And then you can simply connect your 2nd router to another wall socket, may be in other room and connect your to your extended wireless network, via a wired LAN cable or wirelessly.
You will now be able to access internet and other services on all those devices connected to your 2nd router too.

Scope for improvement: Setting up configuration without having another sub-net in 2nd router.


Read more...

Saturday, February 8, 2014

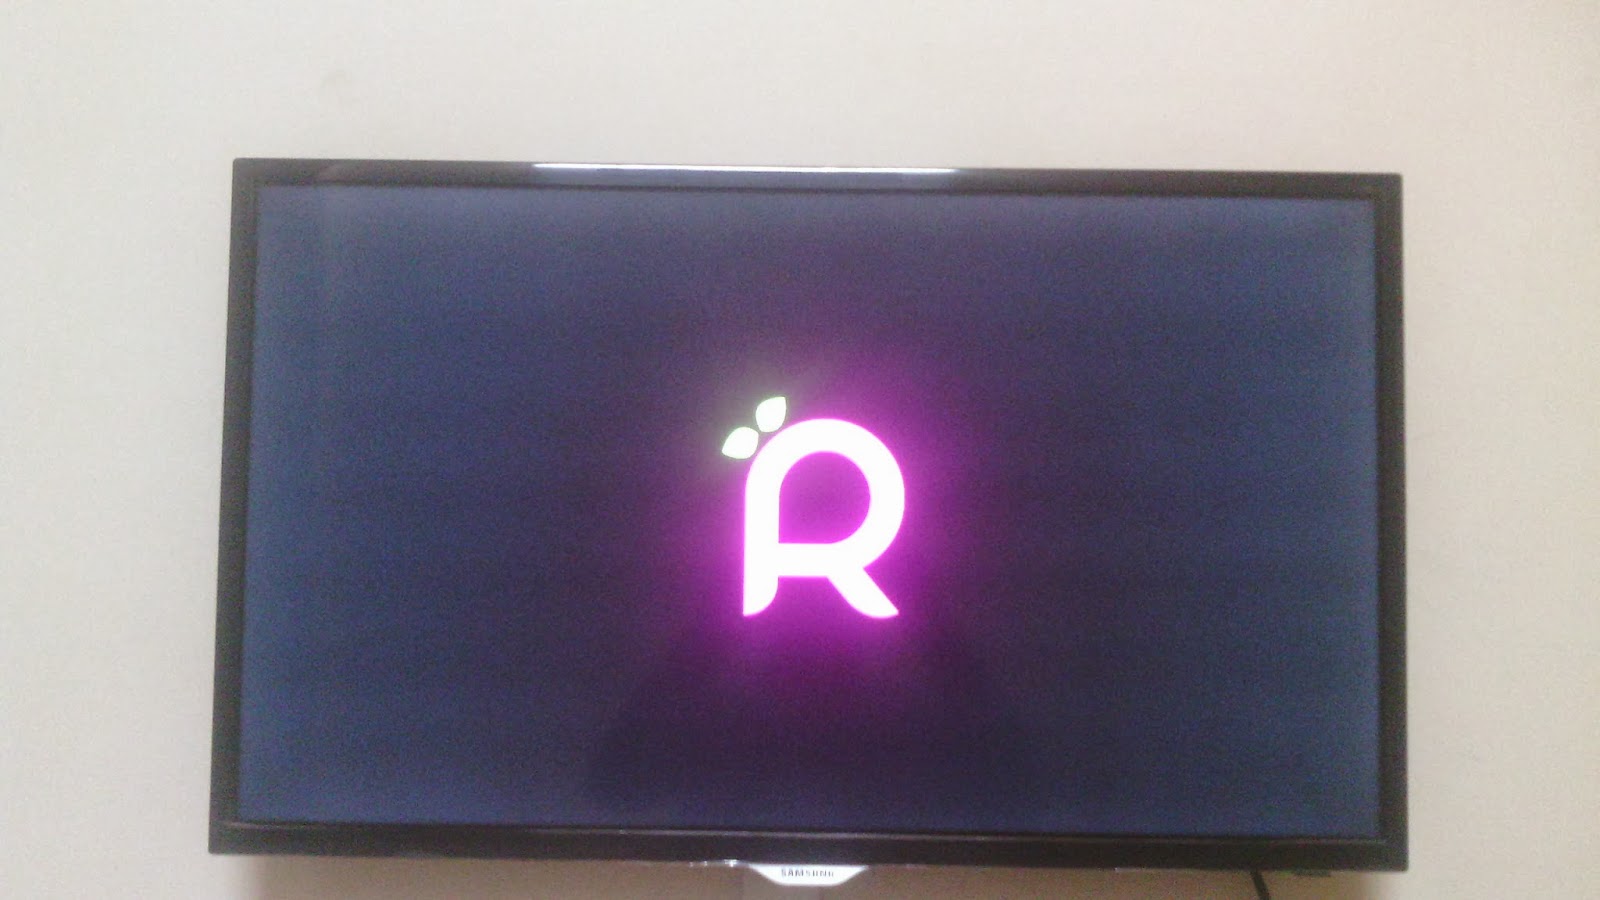
How to convert any old LCD / LED / Plasma TV into a featured SMART TV


Aim of Tutorial: To convert any LCD/ LED / Plasma Television into a smart television with built in multimedia applications using Raspberry Pi.


Required:
1.> An Internet connection and a LAN Cable.
2.> Raspberry Pi Computer and case.
3.> A standard micro USB mobile charger (5V, 700-1000 ma).
4.> At-least a 4GB SD card or micro-SD card with adapter.
5.> USB Card Reader if no laptop.
6.> HDMI Cable

Download:
1.> Win32 Disk Imager application
2.> Raspbmc_latest.torrent or Direct download raspbmc_latest


[PART-1]: Installing Raspbmc onto Raspberry Pi.

1.> Connect the SD card to a computer using a card reader.

2.> Run Win32 Disk Imager as administrator and browse the raspbmc-2013-12-23.img file.


3.> Now select the appropriate removable disk drive letter from the drop down list (be careful) and press the "Write" button.

4.> After the process of writing completes, safely remove the USB card reader and the SD card and plug it in the raspberry Pi.

5.> Connect the LAN, HDMI, USB Keyboard and Mouse to your Raspberry Pi computer, and power up the system.

Note that, you can use TV's own USB port to power up your Raspberry Pi, in case you do not have any USB port, you can use a standard MicroUSB mobile charger to power up your Raspberry Pi.

6.> In the initial setup, you will be greeted with  completing configuration menu from step 1 to 2. your raspberry pi will restart several times to finally show the welcome screen.


7.> Select appropriate language and locale, if you miss out you can change it later from settings menu.


 8. > You can change any settings related to your Video / Audio output from "Settings" menu, also if you need to tweak your raspberry pi's performance, it can be done from additional settings under "Programs" menu. (though its not necessary until you are geek)


9.> The best thing about Raspberry Pi is that it comes with HDMI-CEC technology, which allows you to remote control the Raspbmc operating system and TV with help of your TV remote simultaneously.

[Part-2]: Navigation using the TV Remote / SmartPhone.


1.> The Directional keys can be used to navigate through menus in XBMC
2.> The Exit button can be used to return to the previous menu.
3.> The Play, Pause, Forward, Reverse and stop buttons can be used to control all your media playback.
4.> The Power button will turn off Raspberry Pi and the TV simultaneously.
5.> The volume button can be used to increase the volume of the playing media.

You can refer to my other post where, I have explained how you can use your smartphone as a Wifi Remote for your Raspberry Pi XMBC media center.


Read more...

Friday, February 7, 2014

How to setup Raspberry Pi computer for Torrent downloading and Network Added Storage.

Aim of tutorial : How to setup Raspberry Pi for downloading Torrents and NAS.


This setup will allow one to access their hard disk drive connected to raspberry pi as a network share in windows or an android phone and also enable raspberry pi to download torrents from the internet and automatically share it on the network.  The tutorial is divided into 2 Parts as follows:

1.] Installing Samba server.
2.] Installing the Transmission Torrent Client.

Login to your Raspberry Pi as default user: 
pi user and password: raspberry
Use "sudo" with every command.

Type the following commands:

[Part 1]: Installation of Samba and Mounting an external USB Hard Disk Drive.


1.> Install SAMBA on Raspberry Pi:


sudo apt-get update
sudo apt-get install samba samba-common-bin
sudo cp /etc/samba/smb.conf /etc/samba/smb.conf.copy

2.> Add support for NTFS drives:


sudo apt-get install ntfs-3g
sudo fdisk -l

>> Note down the drive name ( my 1TB drive was listed as: 
/sda1)

3.> Mount the harddrive and setup mount points:

sudo mkdir /media/WD1TB

4.> Configuring SAMBA:


sudo nano /etc/samba/smb.conf

Look for ############Authentication############## line

under which you need to remove the # symbol from the line: 

security = user 

and also copy paste the following lines at the end of the file:

[WD_1TB]
comment = WD_1TB
path = /media/WD_1TB
browseable = yes
writeable = yes
public = no
read only = no
valid users = pi


Use "ctrl+x" and then "y" and then "Enter" keys to Save and close the configuration file.

5.> Save and restart SAMBA service:
sudo /etc/init.d/samba restart

6.> Add Unix users: (no need to perform this step if Pi user is already exists)


sudo useradd pi -m -G users
sudo passwd pi

Enter the password twice to confirm.(Entered password will not be shown)


7.> Add pi user to SAMBA Users:


sudo smbpasswd -a pi

Enter the password twice to confirm.(Entered password will not be shown)

8.> Setup hard disk to mount automatically even if Raspberry Pi restarts:


sudo nano /etc/fstab

Enter the following line in the last and Save:


/dev/sda1 /media/WD1TB auto noatime 0 0

9.> Restart Raspberry pi:

      
sudo shutdown -r


By entering the samba user id and password in windows network, you should now be able to access your hard drive connected to raspberry Pi. 

[PART 2]: Installation of Transmission torrent client and configuration

10.> Installing Transmission Torrent downloader:


sudo apt-get update
sudo apt-get install transmission transmission-daemon transmission-cli

11.> Configuring Transmission:


sudo service transmission-daemon stop
sudo nano /etc/transmission-daemon/settings.json

Edit the following lines to your needs:


“rpc-enabled”: true,

“rpc-password”: “raspberry”,
“rpc-port”: “9091”,
“rpc-username”: “pi”,
"download-dir”: “/media/WD1TB/Torrent_Downloads”,
”incomplete-dir”: “/media/WD1TB/Torrent_Downloads”,
”incomplete-dir-enabled”: true,
"rpc-whitelist-enabled": false, 
Use "ctrl+x" and then "y" and then "Enter" keys to Save and close the configuration file.


12.> Creating a Downloads directory for Transmission:


cd /media/WD1TB
sudo mkdir Torrent_Downloads

13. > Start the Transmission daemon service:


sudo service transmission-daemon start

Test if the port 9091 is open:

sudo netstat -antup | grep 9091

14.> Adding Transmission to start-up automatically when raspberry pi starts:


sudo apt-get install chkconfig
sudo chkconfig --add transmission-daemon
sudo /sbin/chkconfig --level 2345 transmission-daemon on

15.> Adding User to transmission-daemon group and set up permissions:

sudo service transmission-daemon stop 
sudo adduser pi debian-transmission
sudo nano /etc/init.d/transmission-daemon
and edit the following:

USER=pi

sudo chown pi -R /var/lib/transmission-daemon/info/ 
sudo chown pi -R /media/WD_1TB/Torrent_Downloads
sudo chown pi -R /etc/transmission-daemon/settings.json 


16.> Start Transmission Daemon:


sudo service transmission-daemon start

17.> Accessing Transmission Webpage:


From any device connected to your same network,

open a browser and type:

http://192.168.2.100:9091

This will open Transmission Web-page where you can add, control and monitor your torrents.

Click on the wrench Icon at the bottom to open settings, Network and edit the port to 9092, save.

18.> Configuring Wifi-Router to forward ports for Transmission torrent downloader.


Check how to forward ports in wifi router here: Port Fowarding


Port forward ports 9091, 9092 for RPC(webserver) and Torrent respectively.


Restart the router if necessary and Raspberry Pi

After the download completes, they will automatically show up in the Network share we created in Part-1 of the tutorial.


Read more...

Thursday, November 28, 2013

>>>>>>>>  Fivenet is Back in Navi Mumbai  <<<<<<<<<

Kharghar:                                Mahalakshmi broadband-  8652209979 
                                             
Vashi, Nerul                            INTERNEXT SOLUTION : 9594005090 / 8976676738
     
Sanpada, Vashi, Nerul           GCN BROADBAND : 9324108820 / 022-22975197 / 022-32993467

Vashi:                                     Sky technologies: 9022768209,9773250465,9167770734 


Koperkhairane:                       Ashish & Ashwin Internet Services: 9223333707 / 022-27545707


In case your area is not listed above, do enquire any one of the Internet service providers, who is near to your area.


Read more...

Wednesday, July 3, 2013

How to access Windows LAN Shared drives or folders on your Android device.


Want to add more gigabytes or terabytes of storage or Stream Videos and music without saving to your Android device ?


Here is the following method to do so.

Requires:
1. WiFi Router (My Router's IP address: 192.168.0.1).
2. Desktop / Laptop Computer.  (whose drives or folders will be shared)
3. Android Phone/ Tablet/ Camera, WiFi enabled and connected to router.

Steps:

1.> Install "ES File Explorer app" on your Android device.

2.> Setup a password protected User or Admin account on Windows PC. (mine is User Account name: Varun, Password:123456)

3.> Now suppose, I want to share whole E: drive of my PC with my android Phone. 

        Right Click on the E: drive.
        Select "Share With >> Advance Sharing".

4.> Click on "Advance Sharing button"

      Tick "Share this Folder"
      Click "Permissions" button
      Tick "Full Control"
      Click "Apply" button
      Click "OK" button


Window closes...

Again Click Apply and close buttons respectively for remaining window.

5.> Open ES file explorer app on android device.

Under "Network" select "LAN"
Press "Search" (magnifying glass icon)

6.> It should show up that PC with an IP address (Say 192.168.0.100) OR you can add it manually and put entries as follows:


7> All right, Now you can access, Read, Write, Stream Files directly from your PC without having to download to your Android device first.

Note: Ignore the drive letters shown as "$D" or "$E" these are shown to indicate these drives are present in your PC but not shared.
Read more...

Saturday, April 20, 2013

A review about Windows Phone 8 and 7.8 Mobile OS based smartphones.

The following review is with respect to Nokia Lumia Phones running Windows Phone 8 and 7.8.

Display: Super smooth touch, colour reproduction, sharp and bright display.

User Interface: Unique Metro Styled-Tiled User interface but has less support for Landscape use. You will always have to hold the phone to Portrait mode for most tasks. Has no option for customizing screen or Phone book Font size or even locking to Portrait and landscape due to above reason.

Applications: Most use-less apps from unknown developers, you will ever find on this smart phone's Windows Phone Market place. You are likely to crave for good applications.


Some of the best applications available are:
Nokia Drive (Offline GPS)
Nokia Maps
Nokia Music (Paid subscription)
Nokia Play to
Nokia Cinemagraph
Nokia Trailors
Microsoft Office with 360 support.
Microsoft Skydrive
Microsoft Maps
Mircosoft Zune Player
Microsoft Internet Explorer 10
Creative Studio
Lomogram
PhotoFunia
Discus
Hike
Viber
WhatsApp
Gaana
Facebook
Camera Extras
Metro Tube/ Tube Pro
In-Built support for major Email-client setups like, GMail, Yahoo, Facebook, Outlook and Custom Mail setup.

More about the Applications:

1. Zune Music & Video Player:
There are No Equaliser settings in Zune Music Player, There is one free to try application for setting equaliser settings. No 3rd party music or video player are available on market.

2. Internet Explorer 10: 
Not up to the mark when compared to 3rd party browser. UC-browser is the only 3rd party Internet Browser available in Market place.

3. Nokia Music: 
The quality of the songs is average since they are meant to be downloaded in shorter time. Also for continuing (after free subscription) you will have to pay for it later on. Note: you will have to buy the subscription from Oxigen partner and later use the key for activation.

4. Support for Google Applications:
No support for Google Products such as Maps, Drive, YouTube  Voice, Gtalk etc. except for Google Mail setup. Microsoft services are not at par with Google ones. YouTube Application on the Market Place is just a URL shortcut which will re-direct you to the IExplorer and then to YouTube mobile site and similarly for maps and other services.

5. Phone Management:
Lacks basic features for logging 3G/2G Data Usage and last call duration  though there is an app for the same called "Counters" its based on pre-inputs from user, which will require you to define your monthly limit for calls, SMS and Data Usage Manually.

6. Skype / Viber:
Skype works just fine.
You are likely to miss a few calls or messages on Viber, if you did not pay attention to your phone or Notification Bar. 

7. CinemaGraph: The most amazing app on the Market place ( Thanks To Nokia ) allows one to record a short video and allows you to specify which part you want to keep animated (moving) and which parts to be kept still along with loop time settings.
The size of each snap is hefty more than 4mb each for obvious reason being a GIF animated image.
The app is now available for IOS platform too.

8.Nokia Drive:
The best GPS application you will ever come across! why ? because it works in offline mode too ! with distance covered, trip meter settings, Voice navigation and Speed gauge. All you have to do is pre-install maps of your region and Voice files of the languages you understand.

9. Microsoft Skydrive and Office360:
They work flawlessly and are well integrated with other applications. Though there is ZERO support for 3rd party cloud storage providers such as Google drives and DropBox.

Games: 
Temple Run 1 and Mortal combat were released a few weeks before. Angry Birds Star Wars and Fruit Ninja are free to try with locked levels.
Temple Run 1 seriously ? aren't these obsolete games according to you ? Imagine Android/ IOS ppl playing "latest" & "Free" and discussing about them on playstore and Appstore and Windows phone ppl yelling and crying (including me) for apps and games.

>> Most of them cannot be played because of limited RAM of 512MB and even 1GB (For temple Run 1). 
Games will come no doubt but a price or free to try if "NEW", and 100% free If OLD.
Do not expect any new games any sooner.

Camera: Best in class even comparable to all the Android smartphones and Iphone 5 out there. Though Panorama feature is not as smooth and simple as Iphone.

Tethering support:
No USB / Bluetooth Internet sharing supported. Only WiFi internet sharing supported with which, you are likely to drain all your battery juice in a couple of minutes of use.

OS Security:
Its a very secure mobile operating system, you will not have to install an Antivirus application on this phone.

Others:
>> No file explorer  or support for exploring LAN shares on your PC. You will need to setup your own FTP or Web server and browse your files from browser only.

>> Support for SAMBA shares is also not present and is limited only from a free to try app.

>> Push SMS notifications after a call or SMS or Data Session are hardly shown. Notification Bar is faulty.

>> You cannot manage your songs, Pictures or Videos without having to install Zune Software for Windows and MAC users. Linux Users will have to rely only on Bluetooth for file sharing.

>> Lacks remote access tools like Teamviewer and Remote desktop Connection is another Paid application.

Price: Nokia have slashed prices of Lumia 820 from Rs. 27000 to Rs. 24000 in just 3 months of its release following with Lumia 920 also.Its just not for the price you will paid for it and the functionalities it will provide.


Read more...

Related Posts Plugin for WordPress, Blogger...